Project Leonard - Z Axis Coupling
Following on from yesterdays Project Leonard post, today I fortunately I managed to get a set of the Z Axis couplings I designed last night printed. If you haven’t been following my RepRap build, yesterday evening I tried to assemble the machines Z axis and hit a small problem, when trying to attach the steppers to the 8mm threaded bar used to lift the X carriage.
The default Prusa couplings just would not grip the 8mm shaft, even when tightened to and/or even past full capacity. A little research of the RepRap wiki revealed another potential design solution as made by Chris Hanton, however I would need to machine the part. Instead I decided to utilise the design as a basis for the development of a printable solution. The above picture shows the bespoke part and the original coupling (with tightening damage).
As you can see from the featured image the new design is much simpler in implementation.
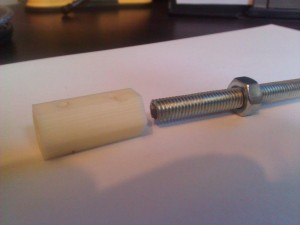
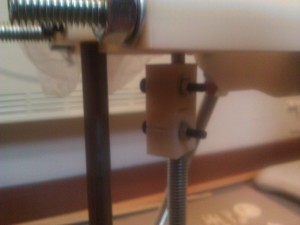
Fig 1: The bar and coupling
Essentially the part has been dimensioned and shaped so that the bar can be used to cut a thread into the plastic forming a tight grip. The grip is further enhanced via use of a grub screw in the form of a 3mm * 10mm bolt. Once again the hole has been dimensioned so that the bolt is self threading, cutting into the plastic upon tightening. This can be further enhanced via use of a pillar drill to form a slight recess in the bolt so that the grub prevents turning.
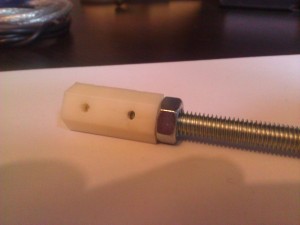
Fig 2: Bar screwed into place
In order to thread the socket the bar needs to be turned slowly into the shaft with mild pressure until it hits the step inside where the hole transitions from 8mm to 5mm. Once completed a bolt is tightened against the base of the socket. Care must be taken at this stage not to force the threaded socket to unscrew and/or the cut thread to break. This is not a problem if the grub is attached beforehand. The above images show the socket befor and after threading.
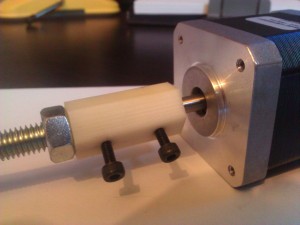
Once complete the stepper shaft is then pushed into the 5mm hole until it meets with the 8mm bolt. This is a tight fit as I dimensioned the hole smaller than the stepper shafts. Again a pillar drill can be used to create a recess to enhance the effect of the grub. Also as before the bolt is self tapping. The following image shows the completed unit with the grubs threaded and attached.
Fig 3: The coupling and stepper
With the coupling issue resolved Its time to get back to finishing the build of the Z axis. I started by attaching the plastic bushings to both the X carriage idler and motor mounts. I eventually plan to replace these with a more robust bushing and/or bearing option so this was done via application of a small amount of superglue to the base of each bushing only.
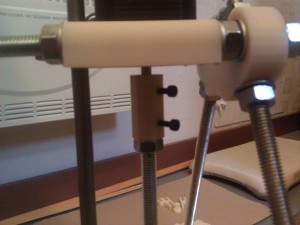
Fig 4: The coupling in place
This will enable me to easily snap them off when the time comes for an upgrade, but due to application use, is also robust enough for temporary and/or short term use. At this stage I realised that I have seemed to have not received or forgot to obtain (must check my parts order!) needed to implement backlash prevention on the Z axis (the two large springs mounted in the X carriage ends). This means that I will not be able to fully complete the mounting at this stage but will be able to get things assembled for a few functional tests.
Fig 5: The original broken coupling
With this in mind I then mounted the motors and shafts on the frame and provisionally mounted the X carriage. The above images show the positioned motor and new Z coupling attatched to the main frame (left). Also included above (right) is the default coupling setup, for comparison.
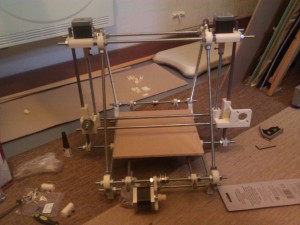
As always I’ll finish up with an image showing the current state of the build:
Fig 6: The current state of play
I hope you will agree things are really beginning to take shape now and the build is well on its way. Tomorrow I hope to finish off the rest of the X carriage by mounting the stepper and the pulley belt. If I get chance I’ll also mount the Y belt leaving me with just the inclusion of the backlash springs (as soon as I get hold of some) in order to finish the frame and/or mechanical elements of the build.
As promised yesterday I have uploaded the .stl for the Z couplings here. Feel free to download it if you wish however please be aware that I plan to decrease the diameter of the hole for the 8mm bar so that a greater grip can be achieved (although perfectly functional, I believe that this will greatly enhance the robustness of the design). I will upload this .stl also as soon as I have finished drawing/updating the CAD and have had chance to print and test etc.
Update: I have included a second .stl in the download, however please be aware that I have not tested it yet. Its only a .2mm difference though so should be ok its up to you. The original I used is the 2.6mm option, enjoy 🙂
