Wiring up a Quadstepper for use with Grbl
In this post I will show you how to wire up a Sparkfun Quadstepper so that it can be used with Grbl. Grbl is an Arduino based open source high performance g-code parser and CNC hardware controller written in optimized C. This means that it can be used to control devices such as milling machines and 3D printers.
To see the final product, without the motors attached take a look at the featured image. All I have done here in addition to wiring the Arduino to the Quadstepper is mount them both to a section of PCB prototype board. I find that this keeps things nice, tidy and contained.
The space at the front has been purposely left to cater for both motor wiring and any additional components that may be needed for wiring up the limit pins (e.g. extra GND pins).
A look at the Quadstepper Circuit
So without further ado lets look at the circuit. In order to make it compatible with Grbl without any code modification, all that is needed is to ensure that the pin assignments comply with those defined in the Grbl code base.
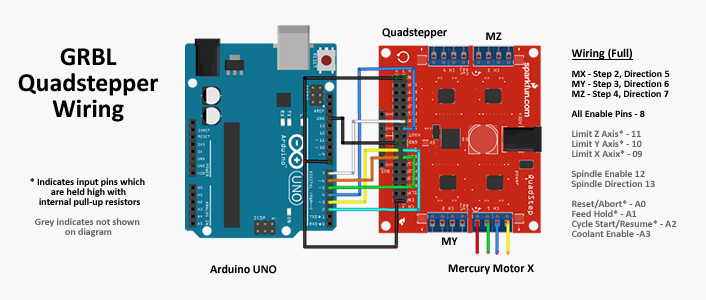
Figure 1: The Quadstepper Arduino Circuit
Fortunately this is an easy task and is achieved by cloning the mappings provided for the connection of EasyDrivers (see here) within the official documentation. For ease of reference I have also included in the above image all the mappings for all the other Grbl pins assignments in addition to the motors.
The Enable Splitter
There is one gottcha however. Unlike the EasyDrivers the Quadstepper requires that you also have the enable pins for each stepper connected.
This is simply achieved by wiring each enable pin to aforementioned pin 8 of the Arduino.
You can also permanently enable each of the steppers by wiring each of these pins to GND.
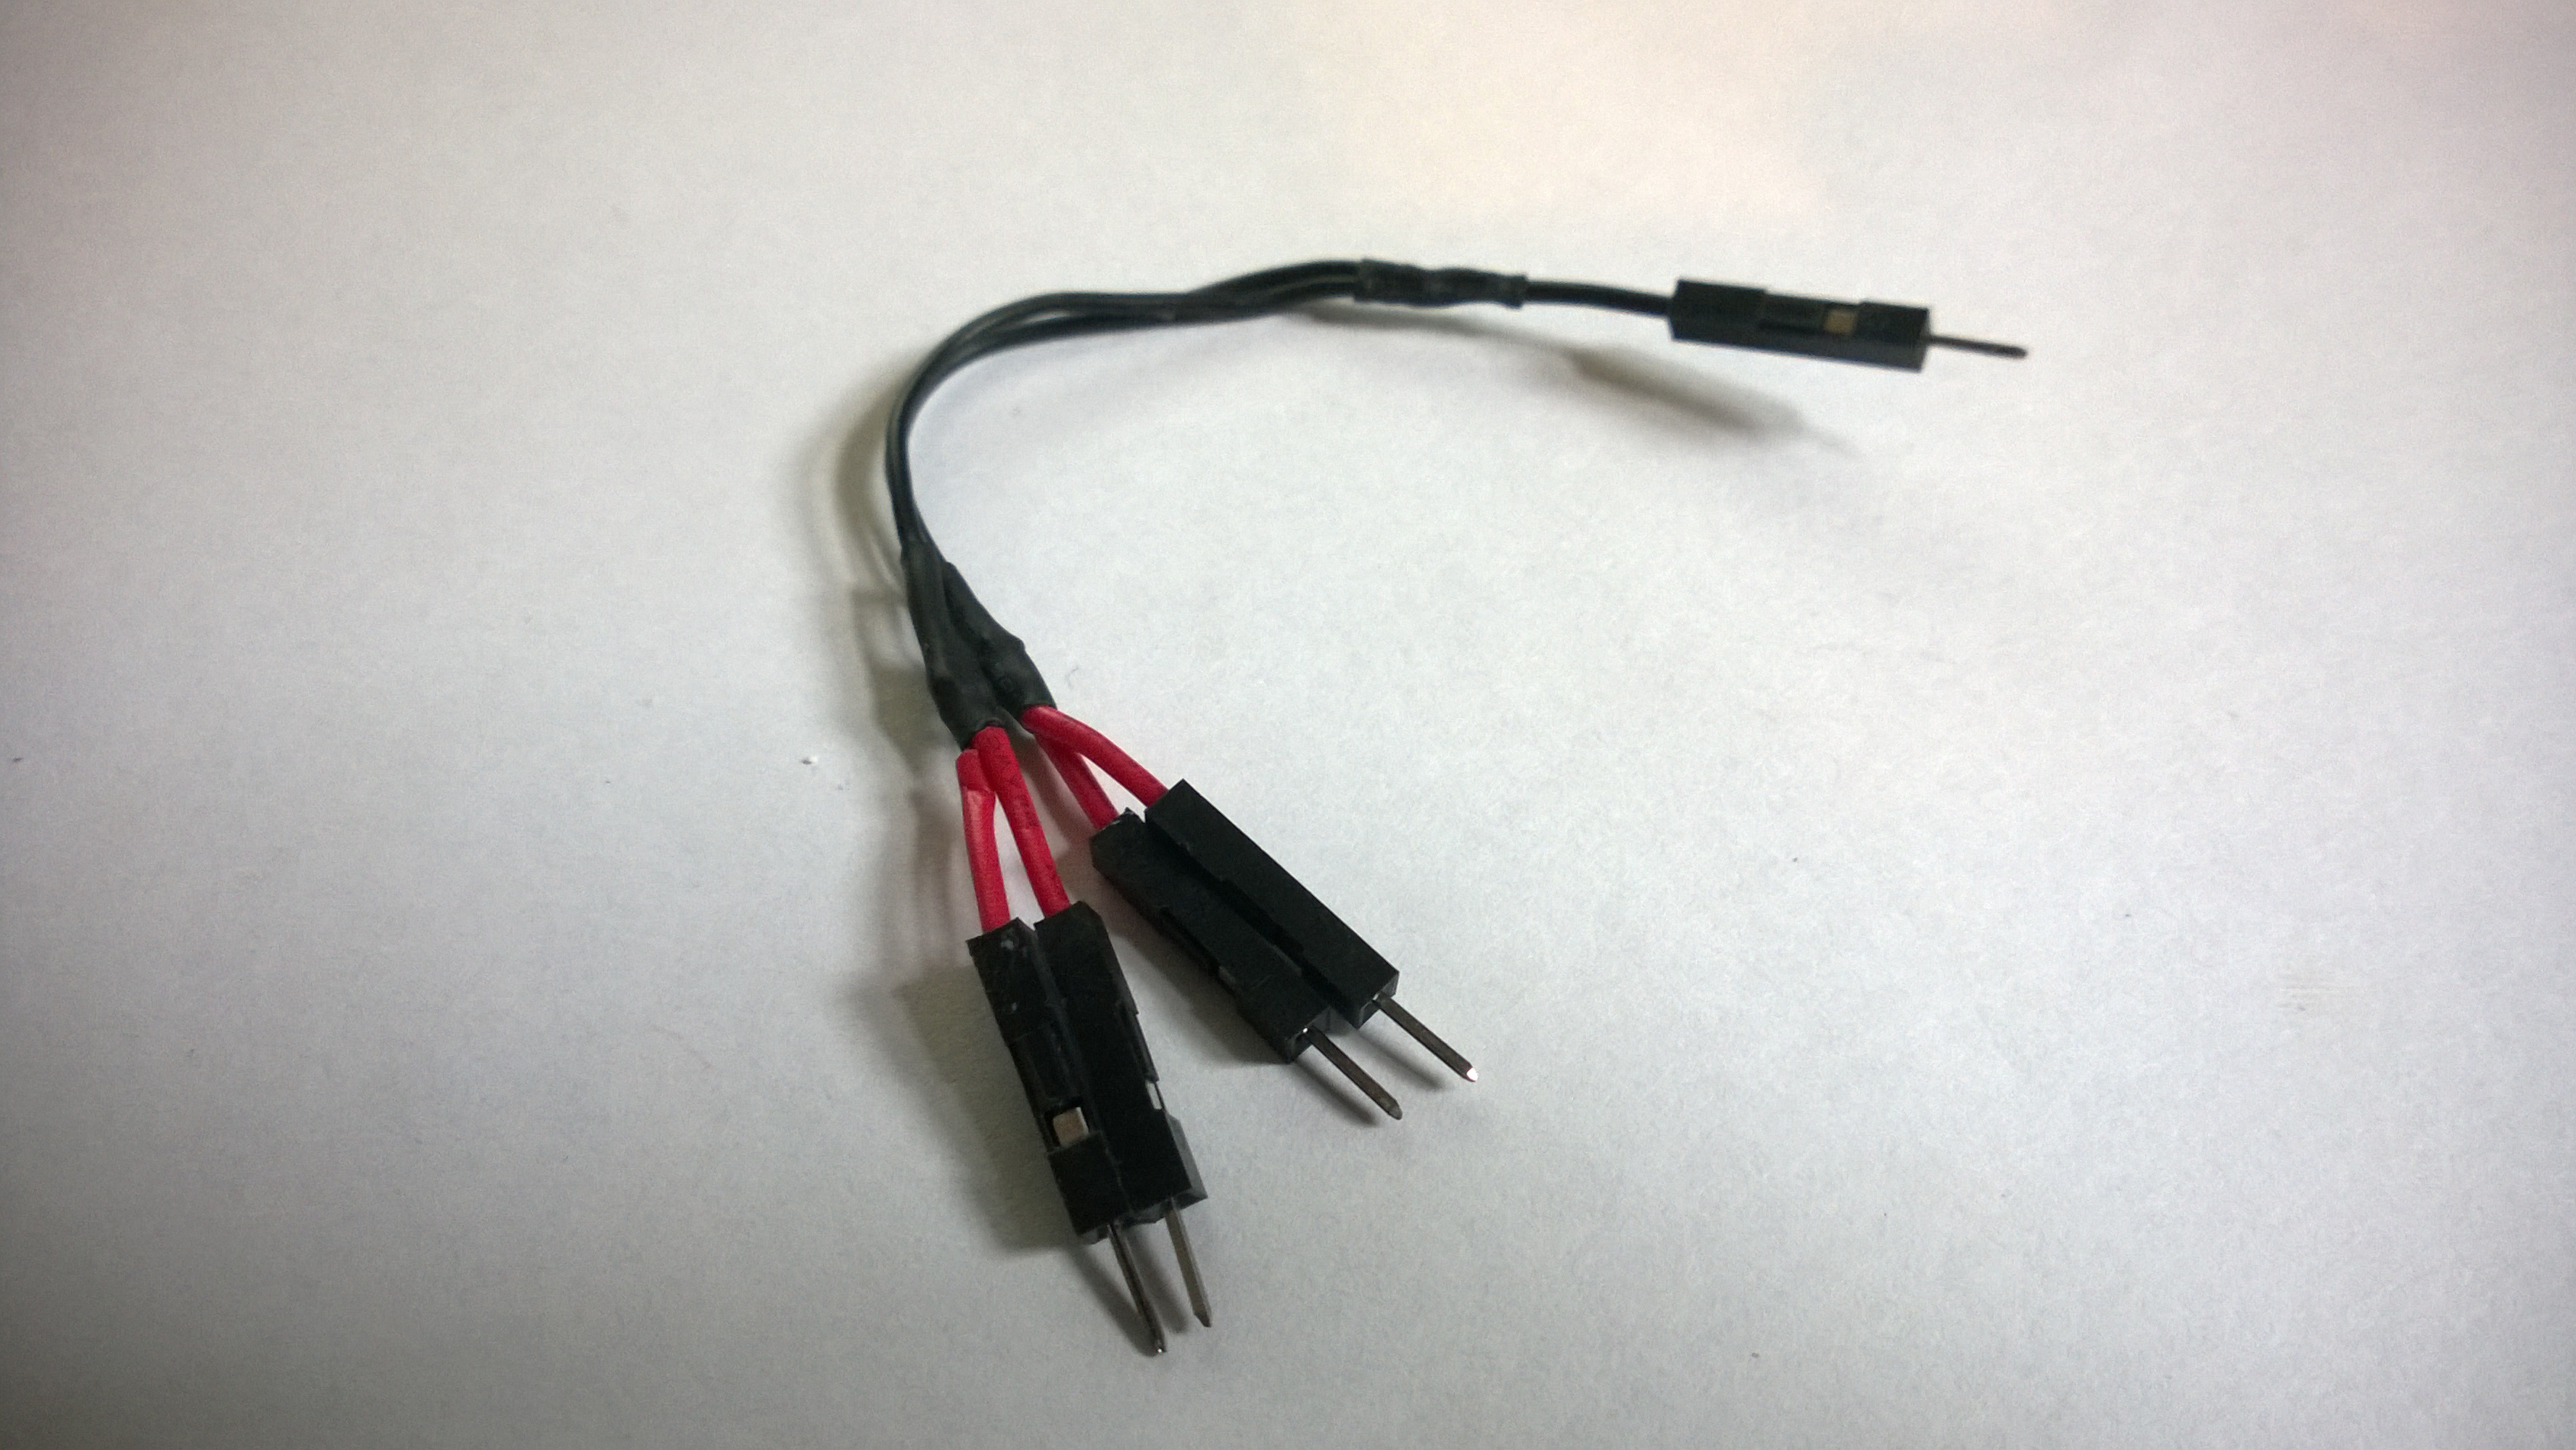
Figure 2: The 4 Way Enable Splitter
To achieve this in practice I created a simple splitter (fig 2) that can be plugged either into the spare Quadstepper GND or pin 8 on the Arduino. That’s all there is to it. So now lets take a look at uploading Grbl to the Arduino so that we can make use of it. I’m only going to be brief here so I highly recomend that you also have a good look at the GitHub Wiki (here).
Windows Instillation via .hex file
To install Grbl in its .hex form all you need to do is download a pre-compiled version (here) and flash it to your Arduino using a tool such as Xloader. Otherwise if you would like to modify the source for bespoke functionality you can also download it from GitHub (here) and then modify it to fit your needs. Then after compiling it into a .hex (see here for more info) again upload it via Xloader. For ease of install I’m going to stick with the former as described below:
- Download the latest compliled version from GitHub
- Download and extract XLoader.
- Open XLoader and select your Arduino’s COM port from the drop down menu on the lower left.
- Select the appropriate device from the dropdown list titled “Device“.
- Check that Xloader set the correct baud rate for the device: 57600 for Duemilanove/Nano (ATmega 328) or 115200 for Uno (ATmega 328).
- Now use the browse button on the top right of the form to browse to your grbl hex file.
- Once your grbl hex file is selected, click “Upload“
The upload process generally takes about 10 seconds to finish. If the upload is successful, once completed, a message will appear in the bottom left corner of XLoader telling you how many bytes were uploaded.
Instillation via the Arduino IDE
For those of you who don’t want to worry about things like .hex files and would much rather use the Arduino IDE, the nice guys at Protoner.co.nz have created an Arduino IDE friendly version that can be uploaded in the normal manner. The steps for install are as follows:
- Down load the library from GitHub here.
- Unzip the library and copy the main folder into the “Libraries” folder in the folder you installed your Arduino software. Eg. C:arduino-1.0.3libraries
- Rename the folder to “GRBL”. (This will stop the Arduino IDE from complaining about the long folder name)
- Open up the Arduino IDE.
- Click on the following menu : File -> Examples – > GRBL (or what ever you renamed the folder to) -> ArduinoUno
- Upload the sketch to you Arduino UNO board.
The source code for this version of grbl is also available and can be found here.
That’s it were done.You should now have a working install of Grbl running via a Quadstepper.

To finish off the above image shows my low cost and home made CNC with which I am currently using Grbl. More on this in future posts.